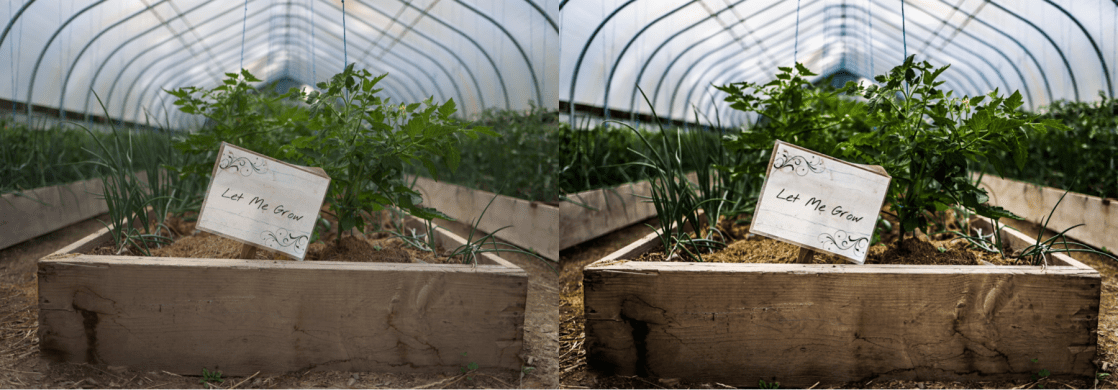
Is editing something that just bothers you? Or maybe you want to get better at it? Not a problem, we’ve all been there!! It takes lots of fun creativity to figure out what editing suits your style best. For me, i usually like high contrast, medium clarity, more shadows, and a bit of exposure for a simple “lift” to my pictures. Of course this depends on the style of photo as well!! I love doing different fun editing like retro or matte or…?! Whatever way you edit, it transforms your photo 🙂
Editing is a way to show your personality through your pictures.
#getcreative

Get creative, Don’t be shy…
This is the first step, don’t be afraid to get “out of that box”!! Get creative with your pictures!! Show your personality. Prefer simple, light, and airy? Go for it. Like dark, moody, do it. Like intents color? Color it up. This is your time to shine!!
What do you use for photo editing??
I use Lightroom, but really you can create stunning photo edits on the regular iPhone as well!!
Let’s start with basics, I’ll show you how I like to edit my pictures then you can go from there!! I like intense color but not overboard, with high contrast, a little exposure, medium clarity, a bit of vignette, and whatever else I think I need to adjust on specific image.
How to edit a picture?
Ok, finally!! Here we go…
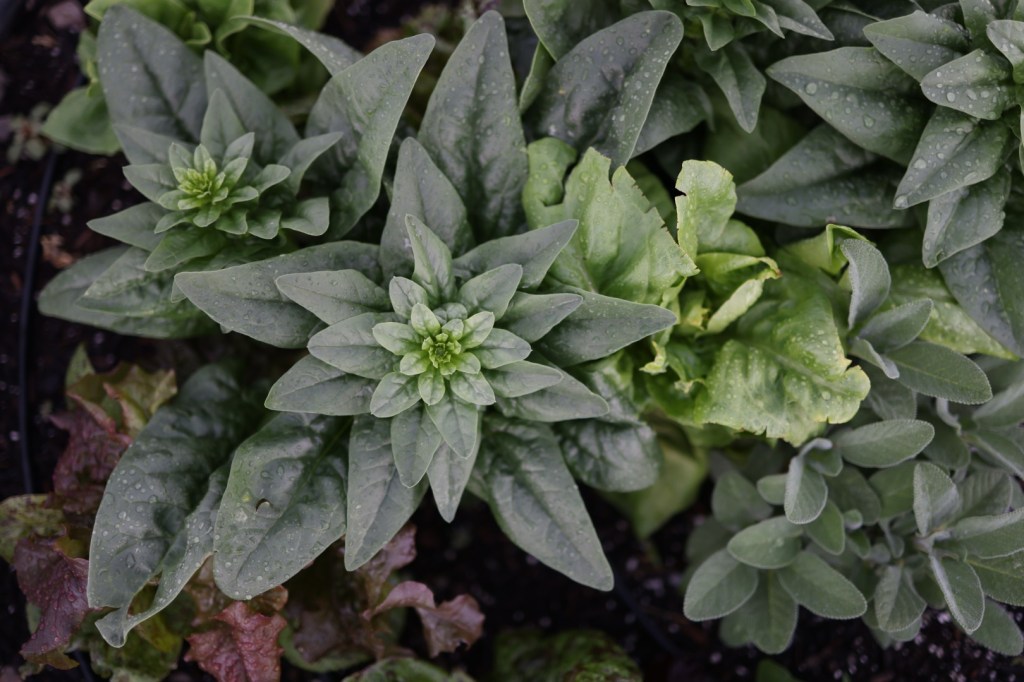
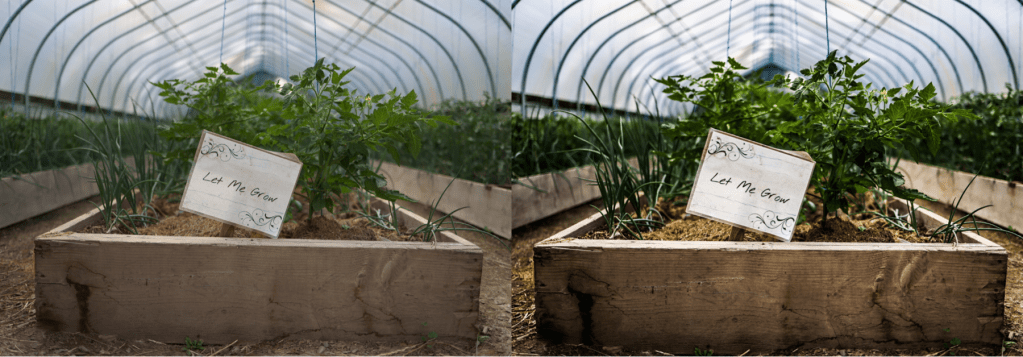
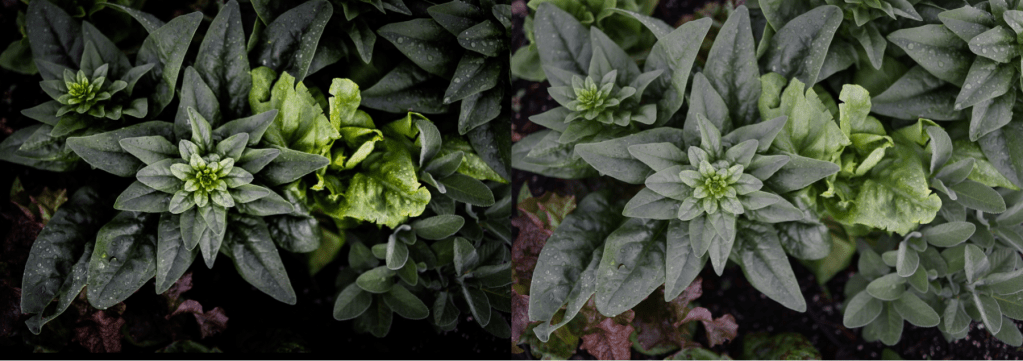
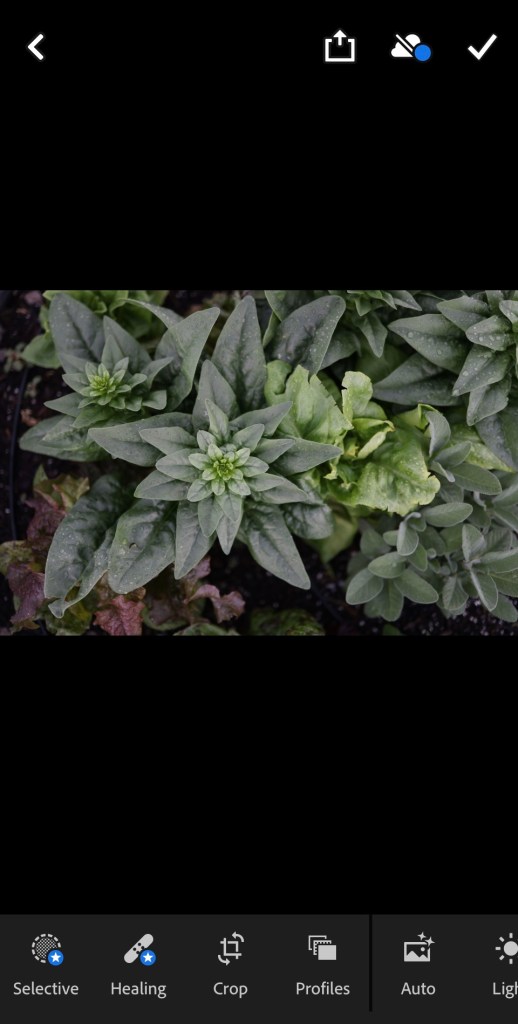
I will us this picture as the example:

Ok, so here is how it looks in LightRoom:
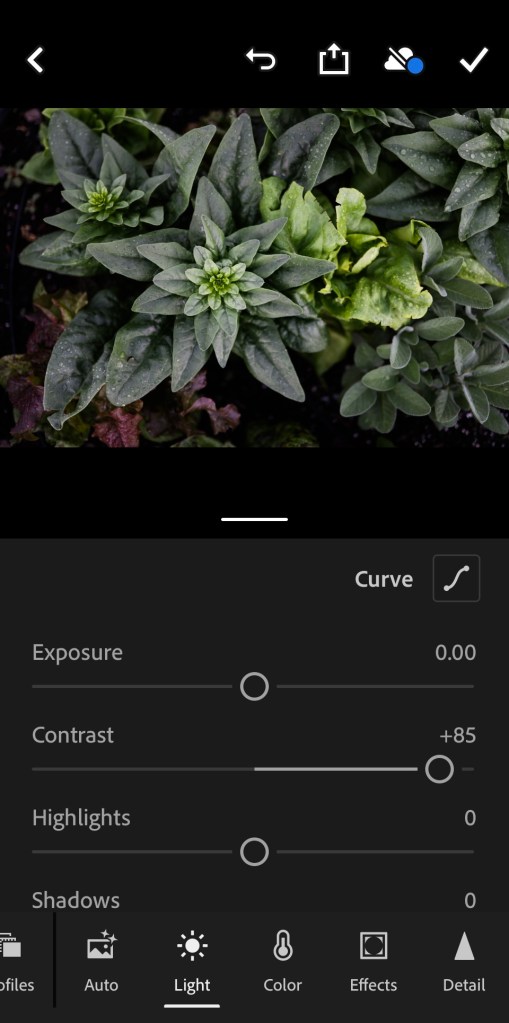
1}. Start with contrast:
No, we’re gonna bring up the contrast a bit, when people are in the picture I tend to do less because sometimes it makes people look funny ☺️. But really, you just gotta play with it!! I got the contrast at 85% intensity here:
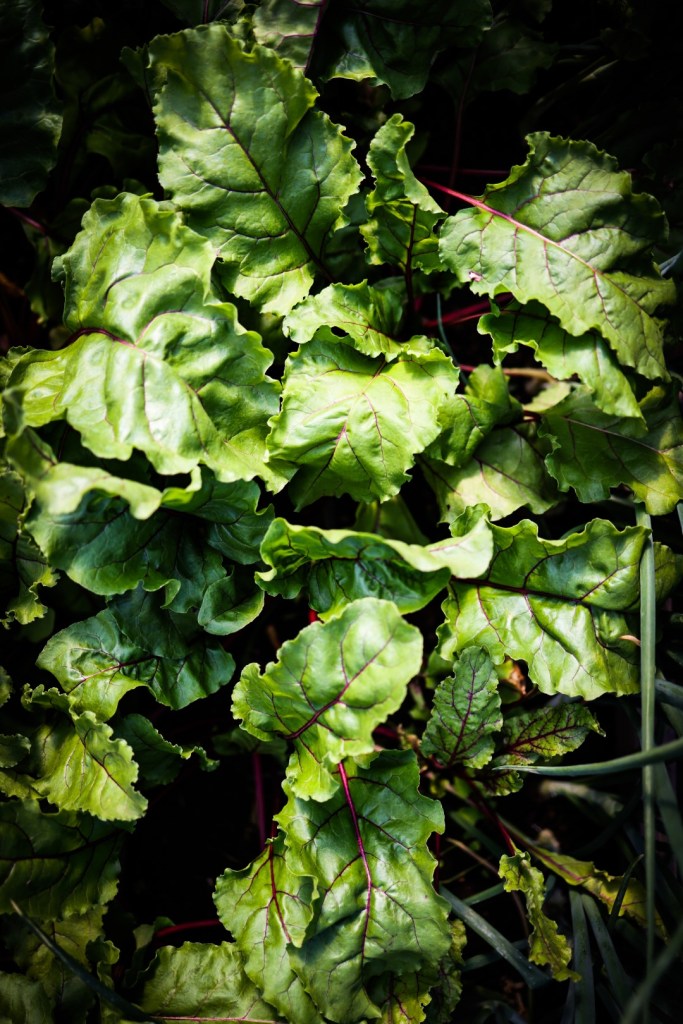
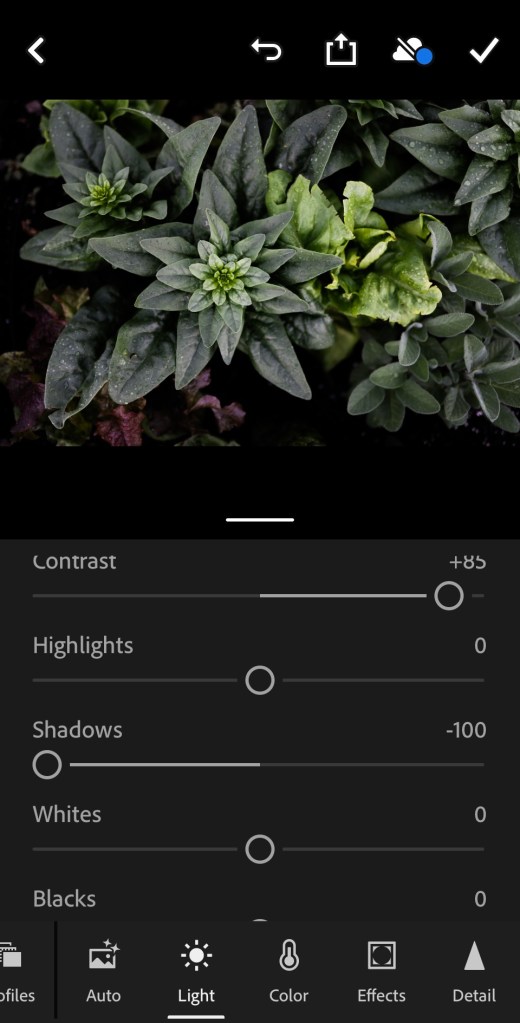
2}. Shadows…
More shadows? Less shadows?? Does this need to even be messed with? In this picture, I did make the shadows more darker because I like the intensity of the spinach and I really like the dark areas in this picture.
I did a -100% shadows here to darken them, if you have shadows you would like to lighten, easily go the other way!!
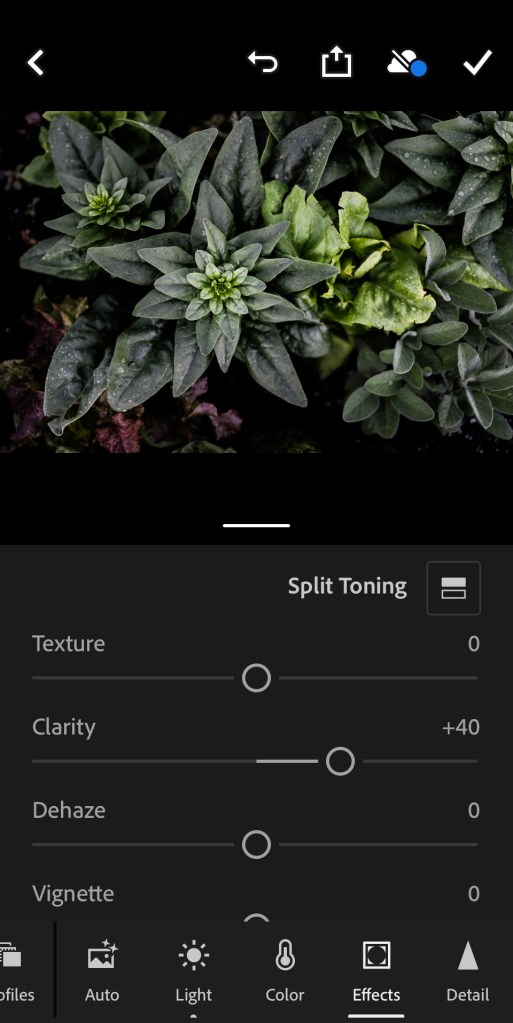
3}. Clarity is fun!
Clarity makes gives the lines in the image more, well, clarity! I like to use this in most everything but pictures with people in them, or if I am trying to make a more subtle food image.
I intensified the clarity on this picture to 40%.
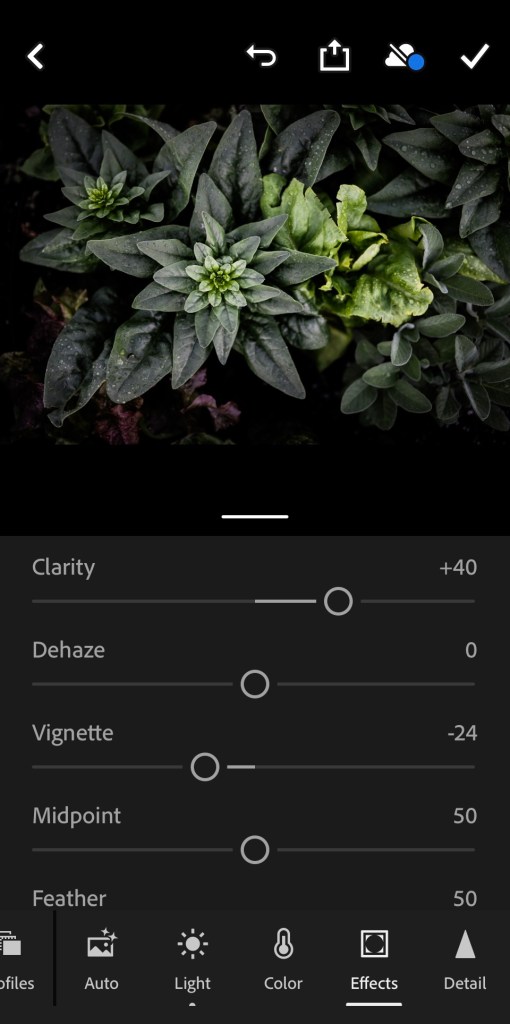
4}. Vignette?
Vignette, pronounced /vinˈyet/. Is a way to darken the edges and bring focus to the center of your picture!! I don’t always do this, but I do a lot☺️.
I did -24% on this picture, going the + way uses white instead of black to lighten the edges instead of darken, I very rarely will use the + in vignette.
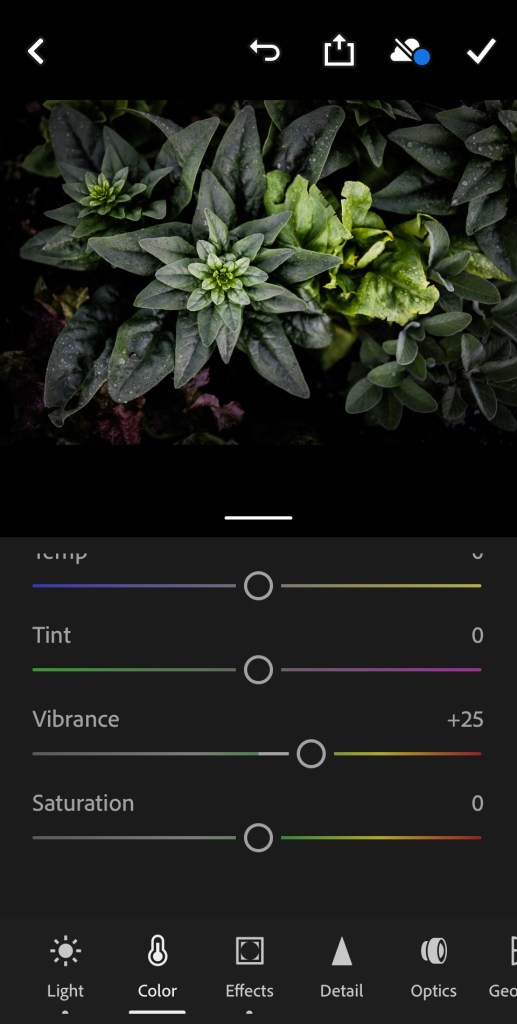
5}. VIBRANCE.
This really depends on the picture, usually contrast, clarity, exposure, and pretty much everything will change the coloring so I like to do this last thing.
I did a +25% vibrance here. I feel like you can easily go overboard on vibrance so try to stay in the lower range.
Well, there you have it folks!! Download the pic and try it for yourself!!
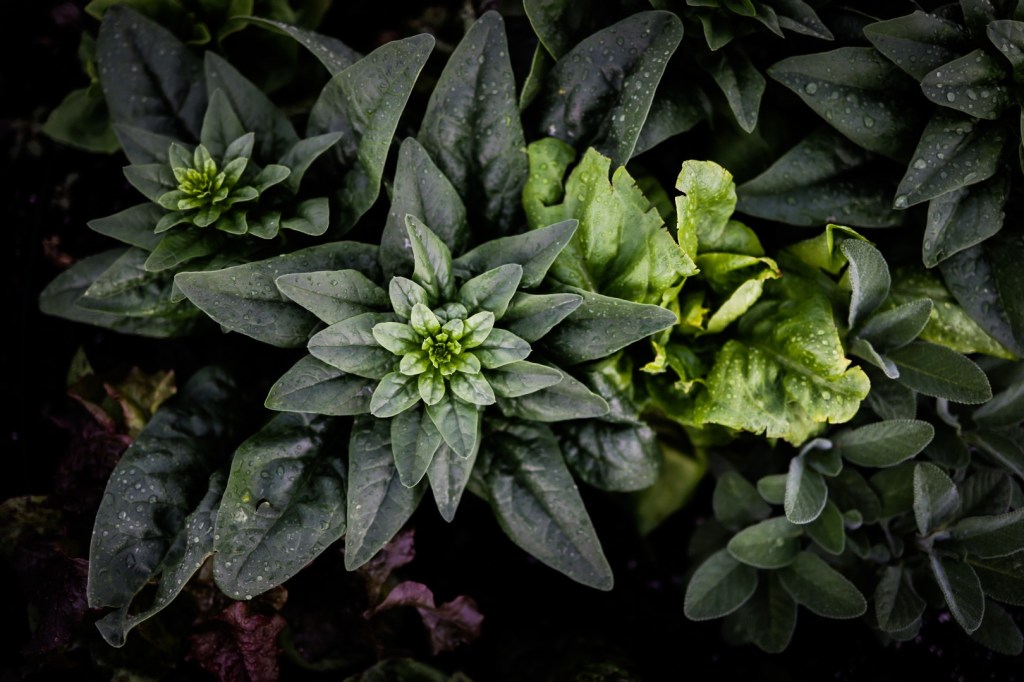
Now download Lightroom. Save this picture by holding on to it until the “save image” button pops up and then click it:). (At least for iPhones this is how it it). Use this picture in Lightroom, and apply all the things I have shown you and see for yourself how fun editing is!!